Google Ads: Using the targets
The Herdify targets for Google Ads are provided as Google Location IDs. This article explains how you can apply them to your existing campaigns.
Requirements
To upload the targets to your Google Ads campaigns you need to have Google Ads Editor installed.
Click here to download Google Ads Editor
Uploading the targets in bulk
-
Open Google Ads Editor and select the account you want to add the locations to.
-
In the
Managepanel on the left-hand side selectKeywords & targetingand thenLocations.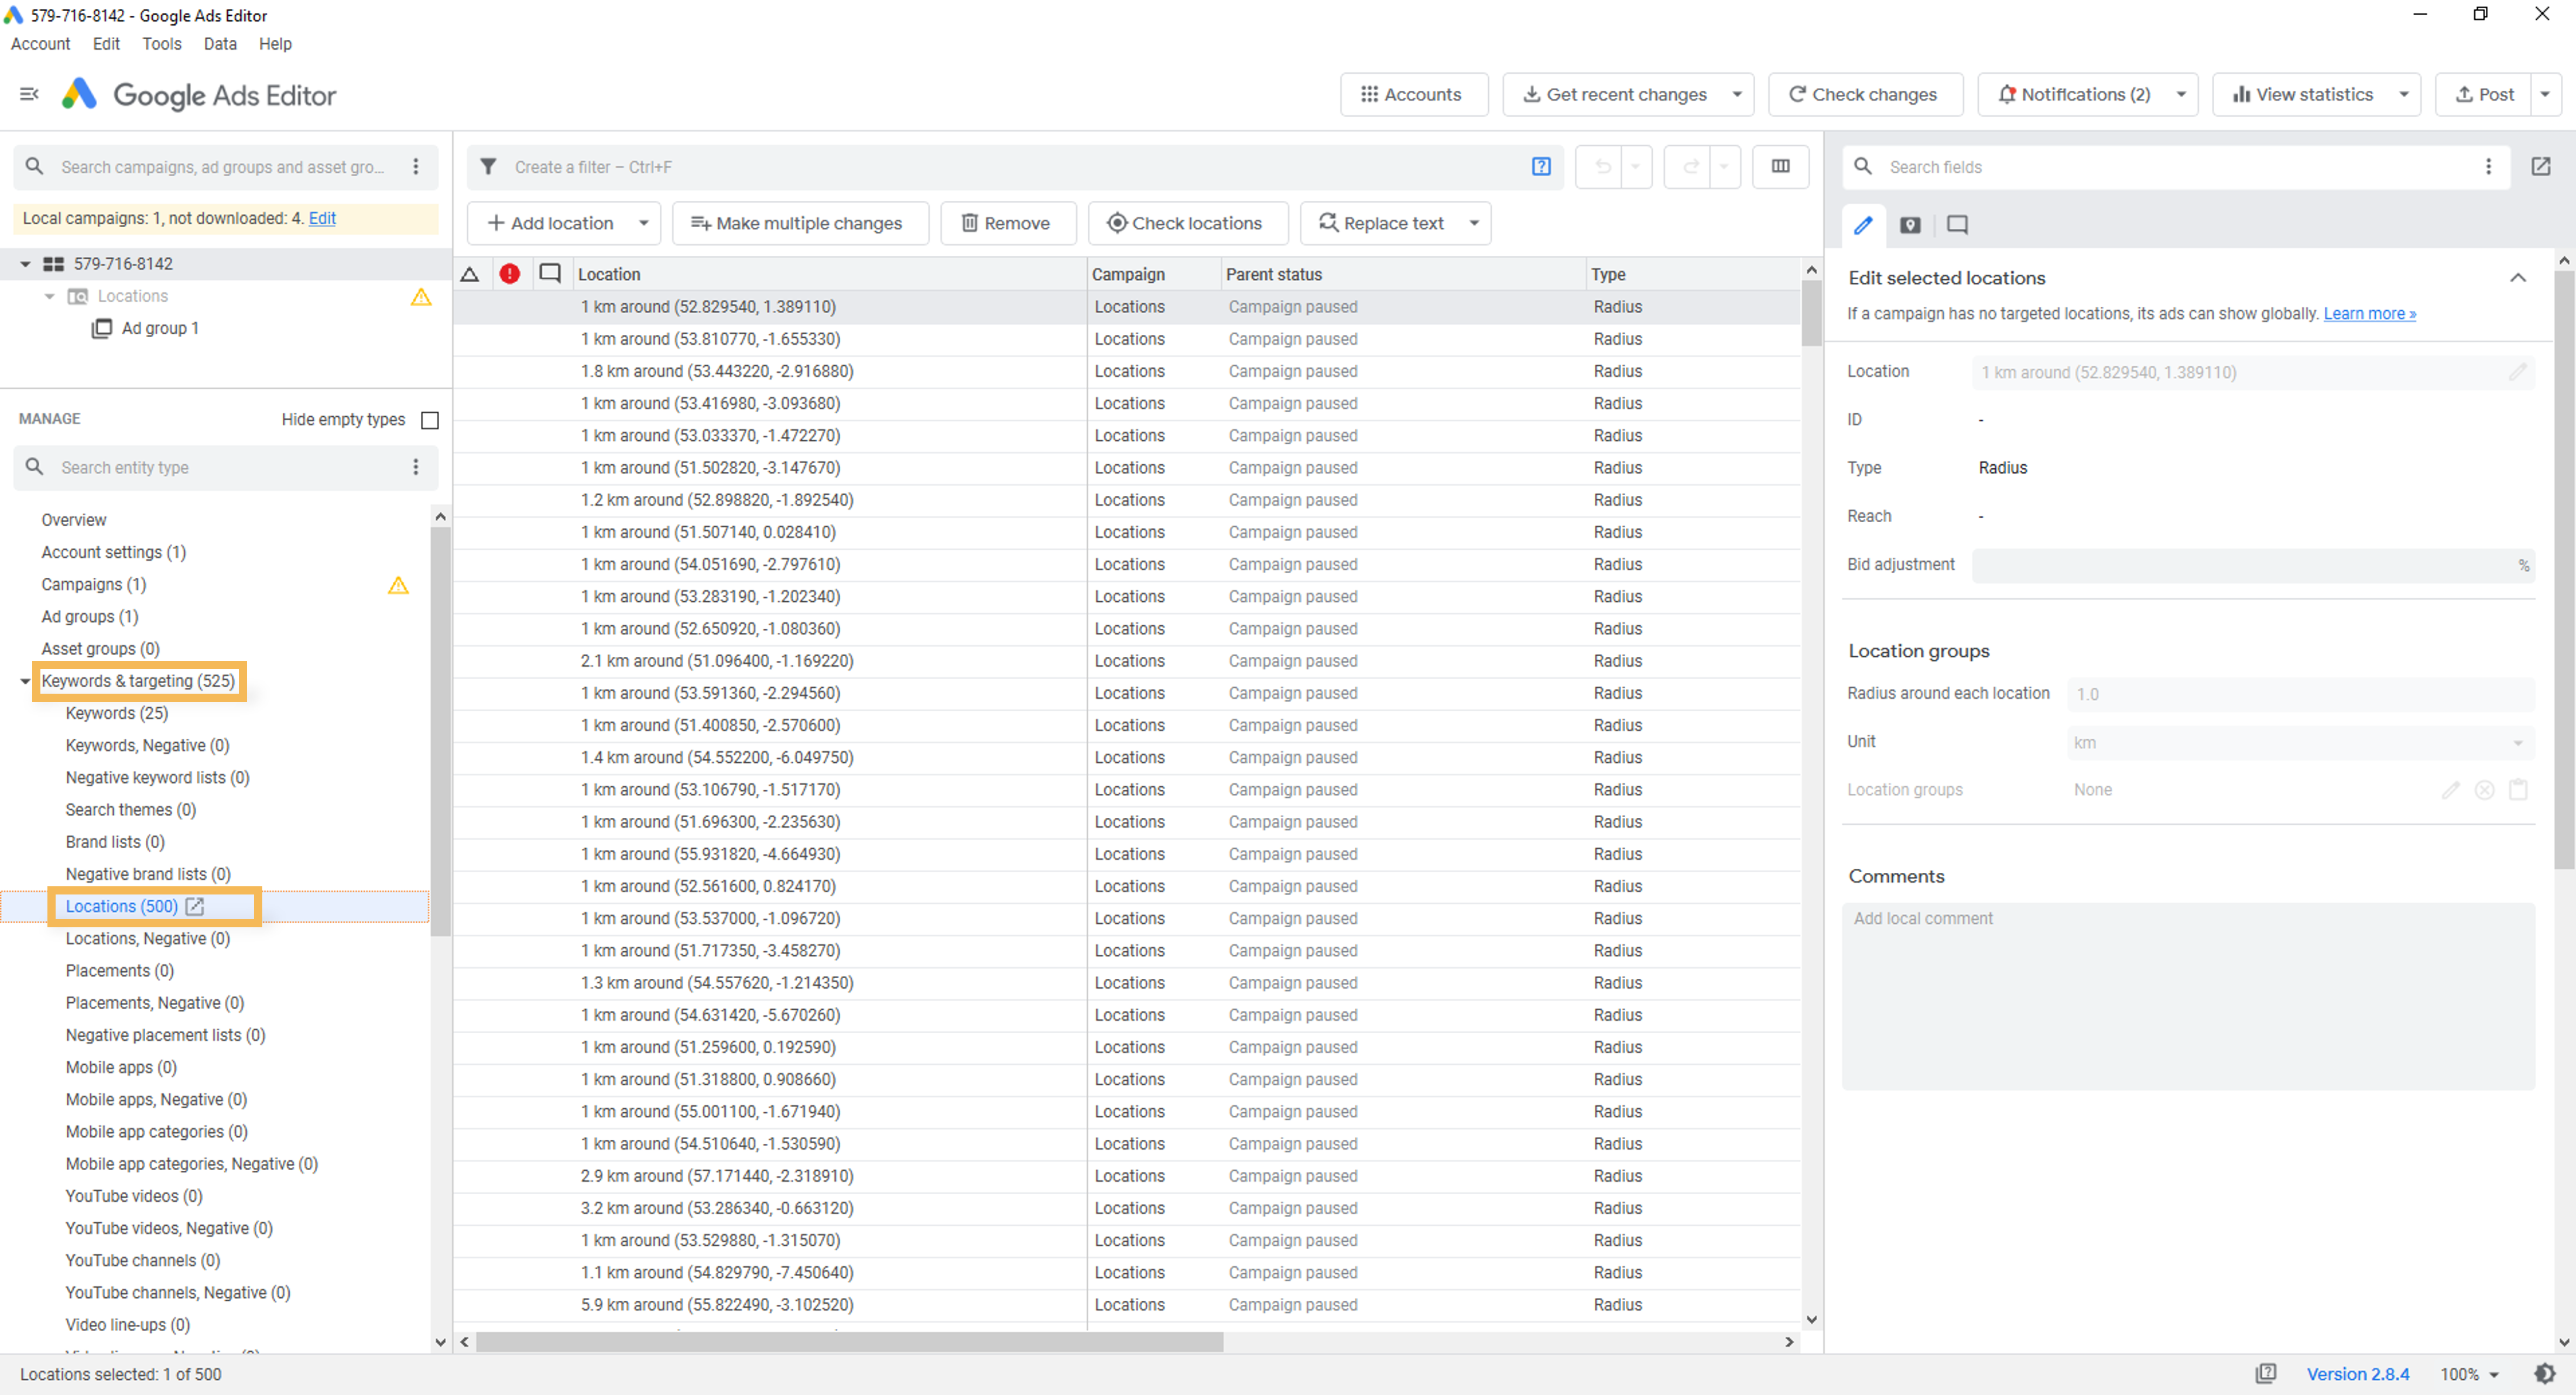
-
Select
Make multiple changes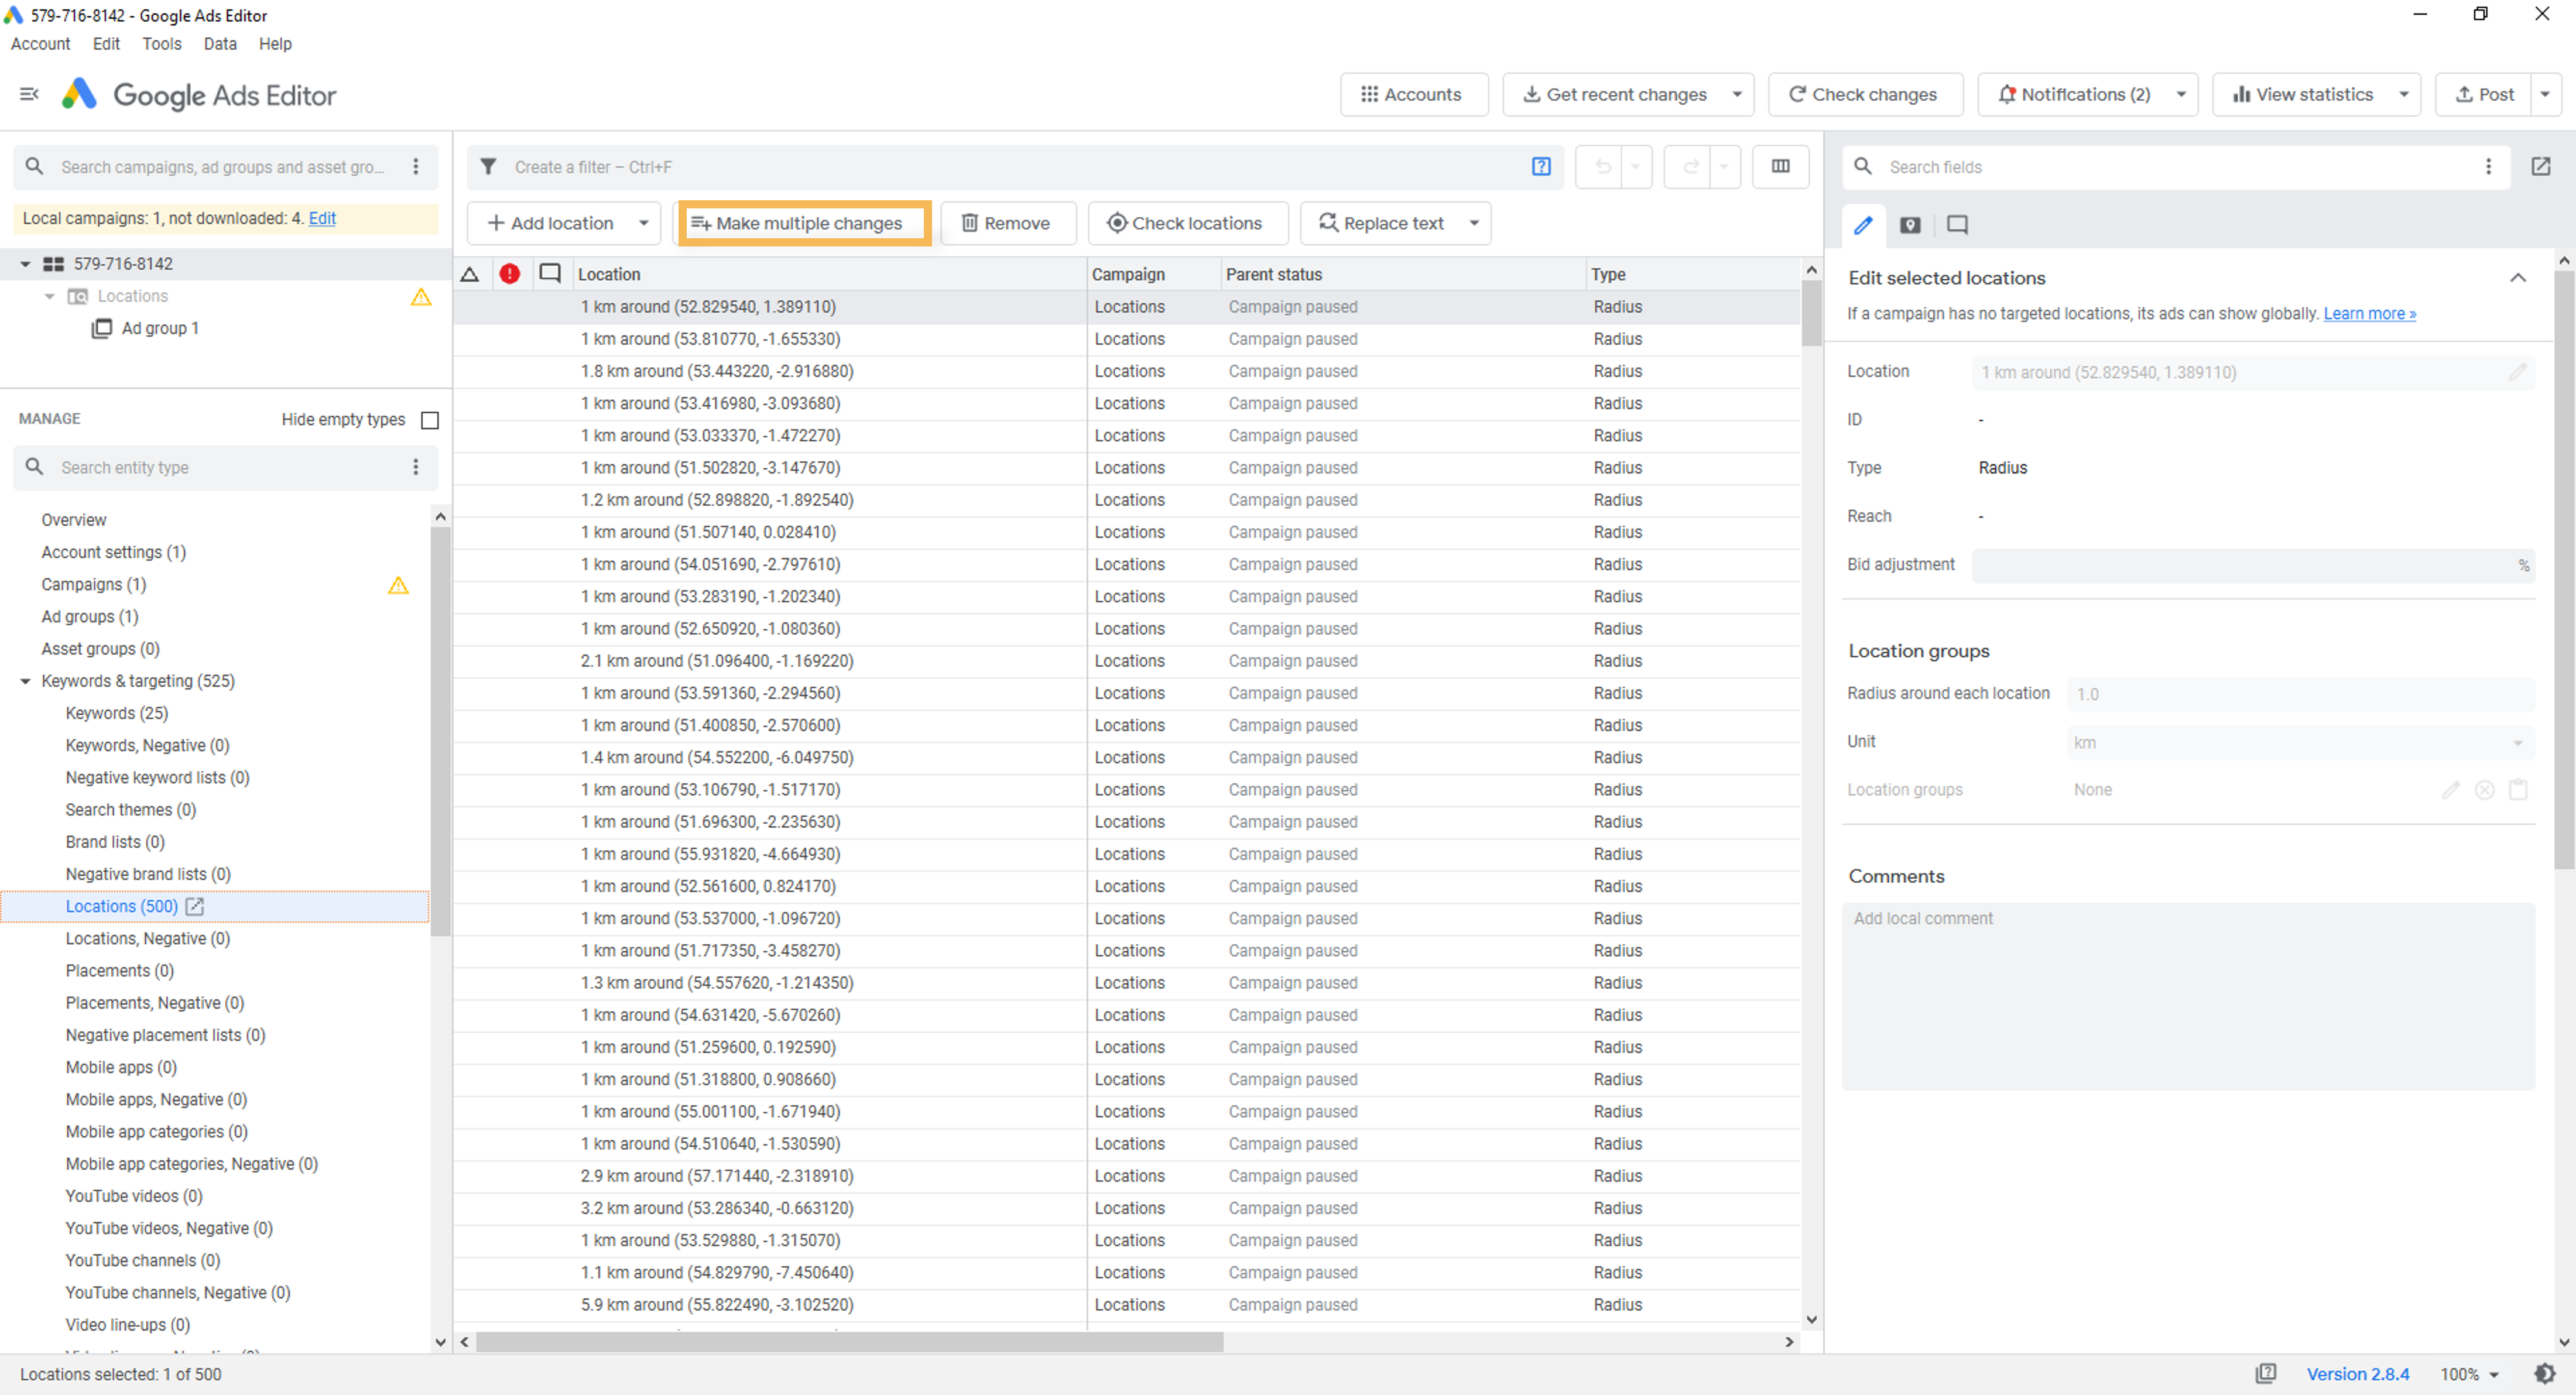
-
In the dialog box set the destination campigns in the left hand panel. First select
Use selected destinaionsand thenAdd as campaign-level locations. In the box below check the tick-boxes next to the campaigns you want to apply targeting. Once you have selected the campaigns input the targets by setting the first column header toIDand the copy and pasting the ids from the targets downloaded from the Herdify portal.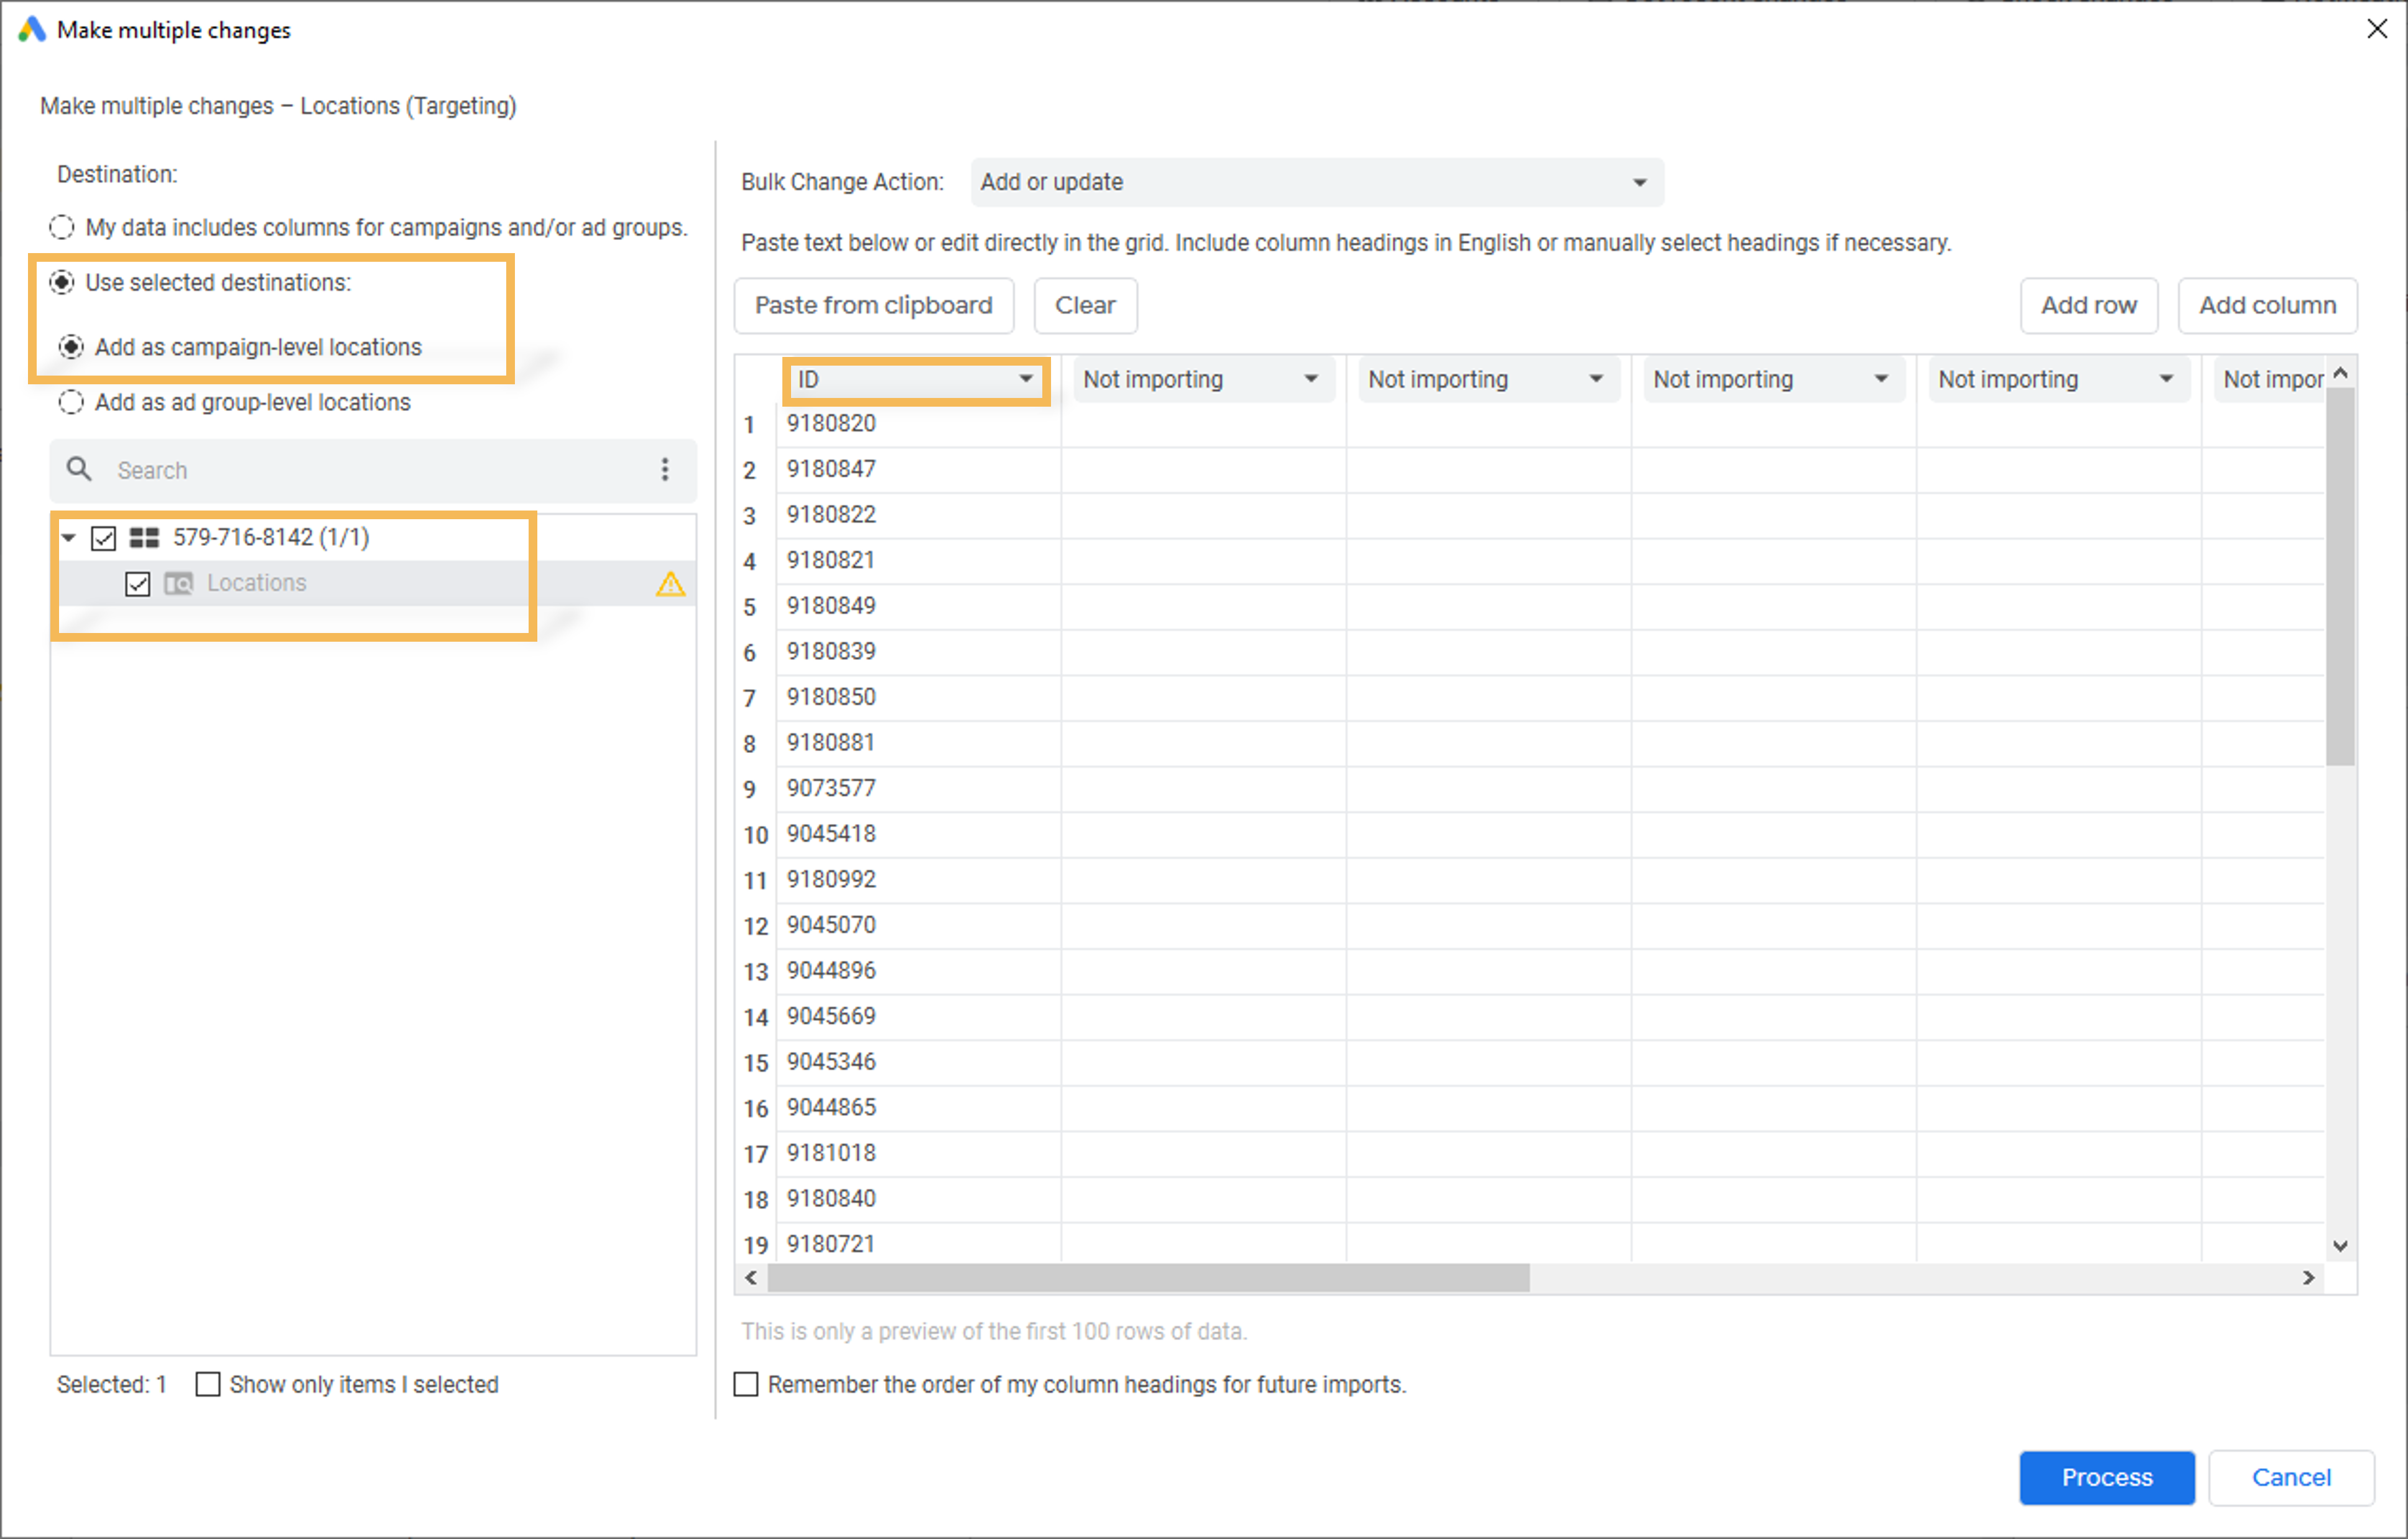
-
With everything set up click
Processto input the targets. On the next dialog box you will be shown any errors, selectFinish and review changesto upload the targets. -
Finally, click
Keep allto apply the changes.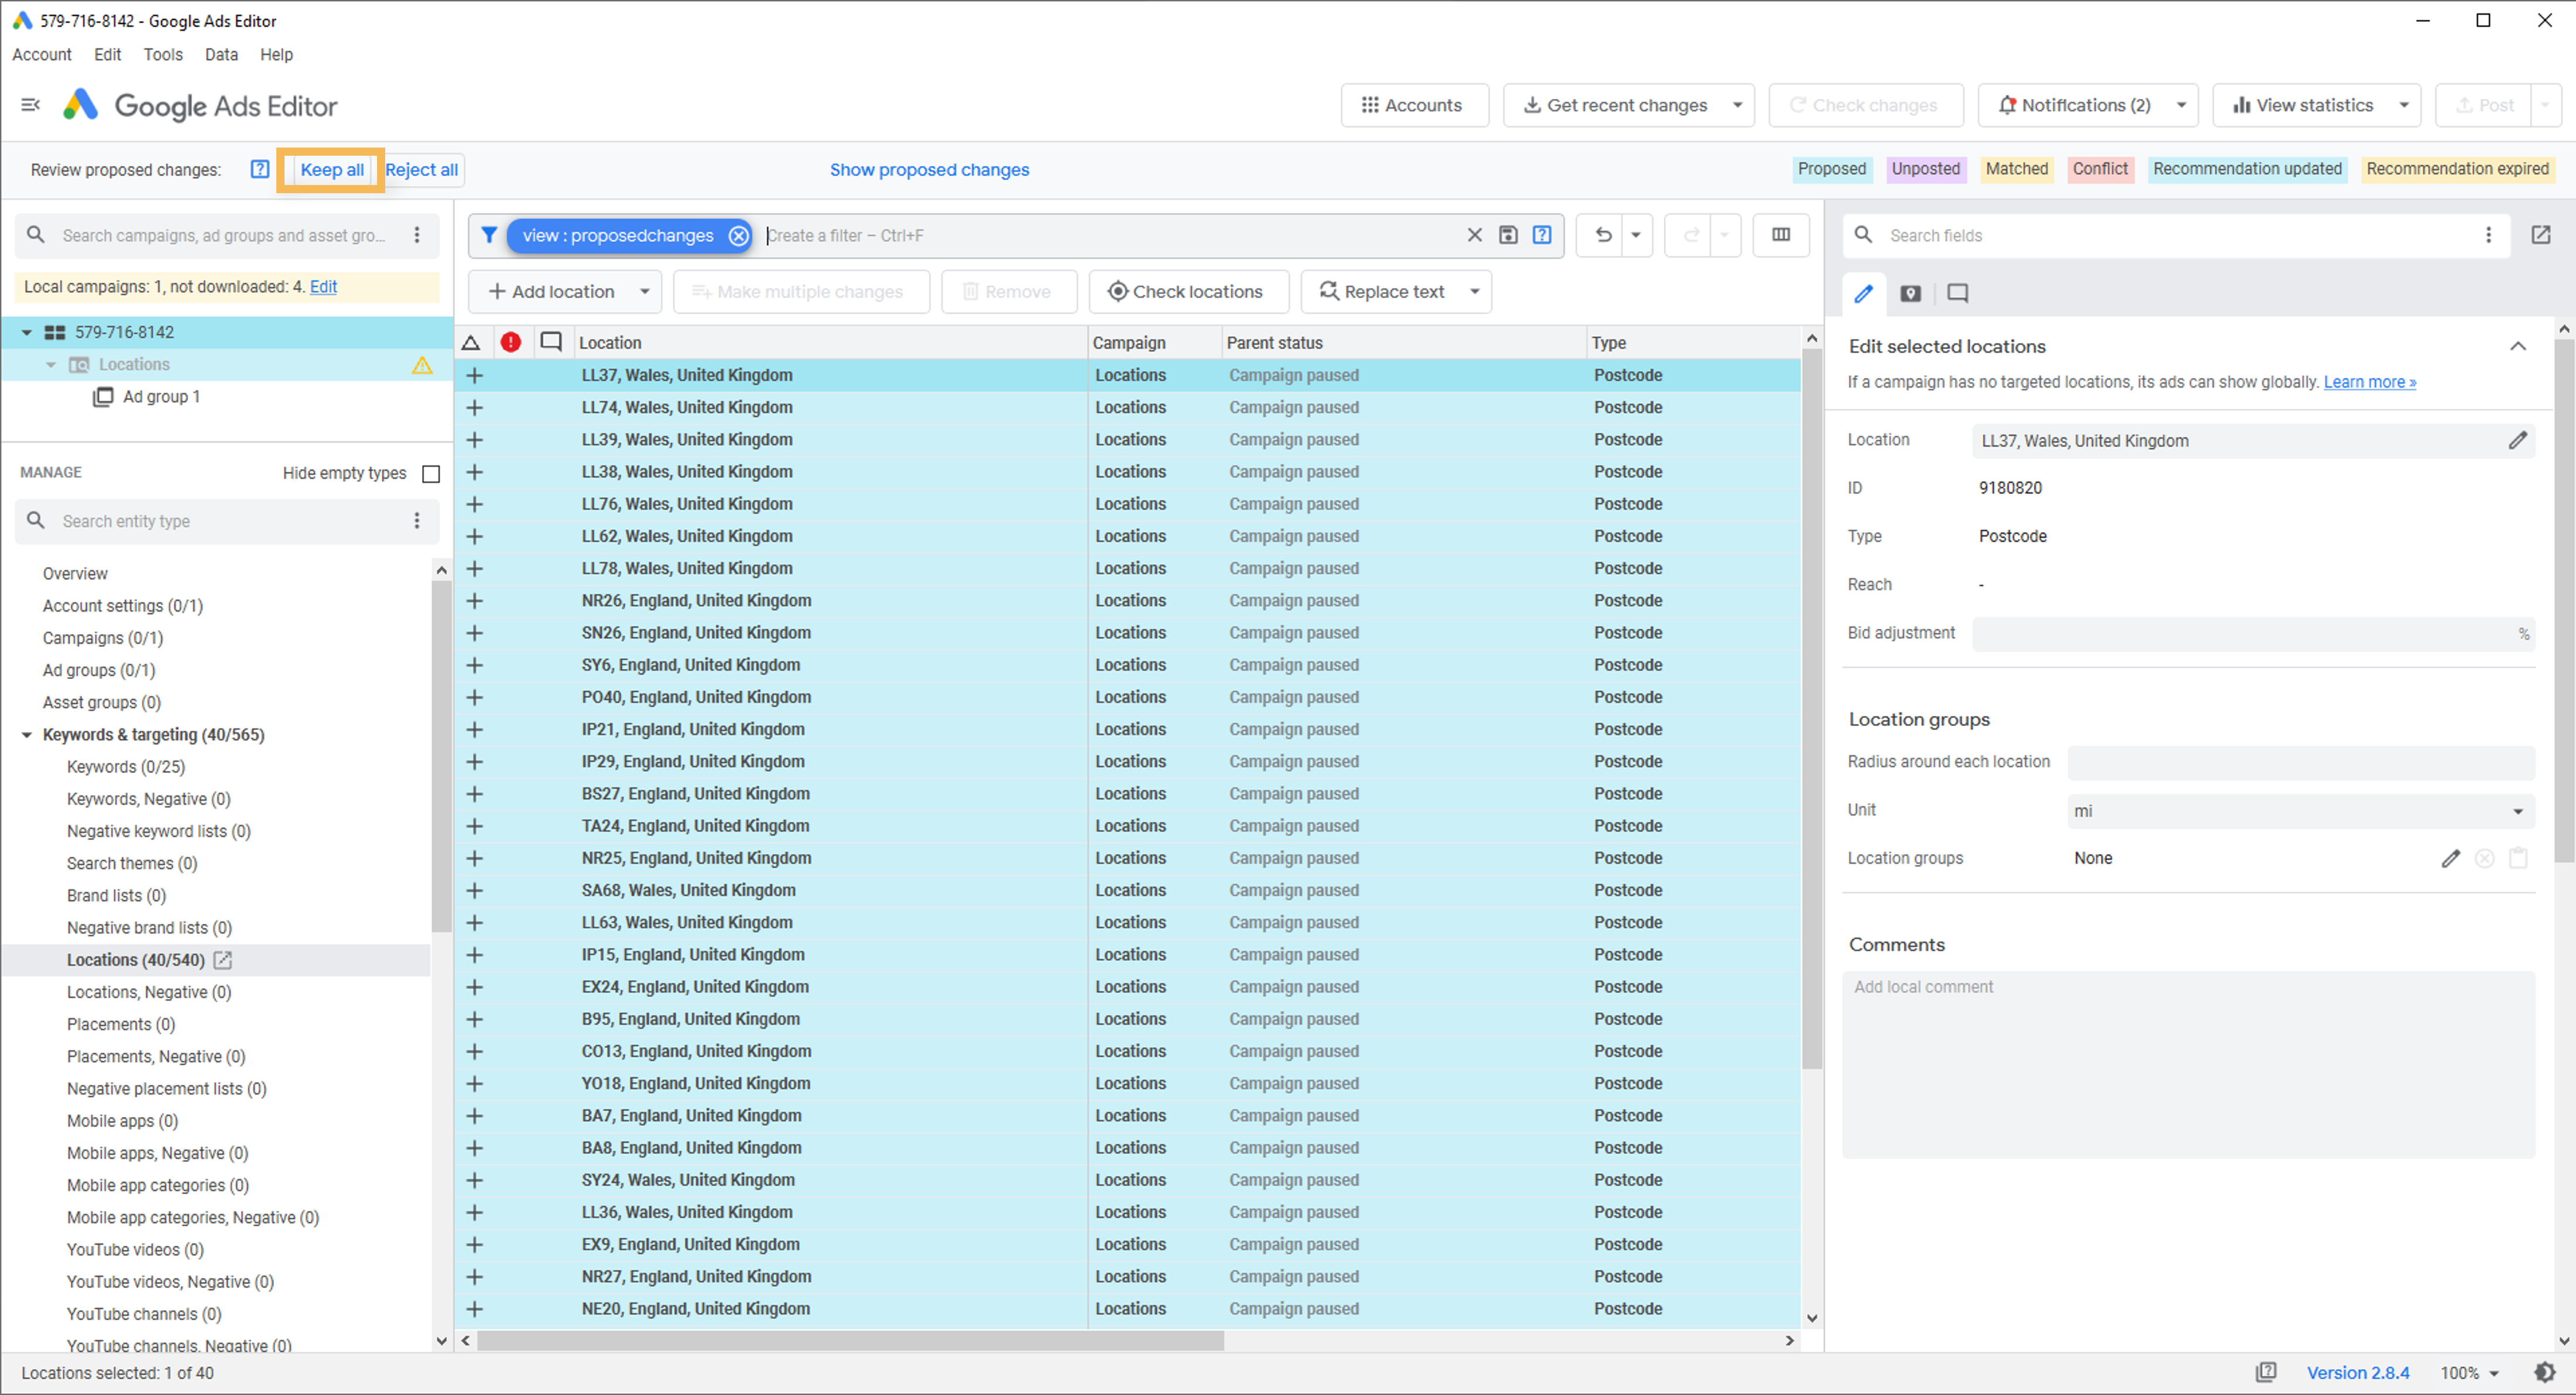
If you encounter any difficulties please contact support@herdify.com.